Scallop Circle Easel Card Tutorial
 Punch Potpourri Scallop Circle Easel Card
in the Dynamic Duo of
Melon Mambo and Pretty in Pink
 1. Score a piece of card stock through the middle (which is double the length of your die) and line up the folded piece over the Scallop Circle Die (SCD) leaving 4 scallops at the top to form the base of your card.
 This is how it should look after you run it through the Big Shot Machine.
 2. Score a line through the middle of the top Scallop Circle and fold upwards.
 3. Apply Sticky Strip or glue to half the Scallop Circle as shown above.
 4. Cut out a single Scallop Circle in the same colour (Melon Mambo) and stick it to the folded half so the top layer sits up like an easel (The top half that is facing will now be a double layer and the bottom half, a single layer of card stock).
 5. Cut two circles using the lighter shade (Pretty In Pink) and attach one to the base of the card. Sponge around the edges with the darker shade of ink before gluing the other circle to the front of the card.
6. Stamp your sentiment on Whisper White and punch it out using the Large Oval and Scallop Oval Punches.
7. Use the Paper Piercing Tool to pierce holes in each of the scallops.
 8. Cut a slightly smaller circle using Whisper White and dry emboss using the Vintage Wallpaper Embossing Folder.
9. Sponge over the raised embossing using the darker shade of ink (MM).
10. Attach a bow to the lower central part of the card.
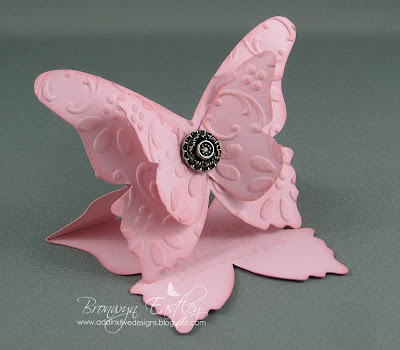
 11. Stamp the images from the Level 1 Hostess Set, Punch Potpourri using the two shades of Pink (Melon Mambo and Pretty in Pink) onto Whisper White Card Stock (Butterfly has been 'Rock'n' Rolled') and punch out using the matching punches. Sponge around the edges of the heart with the darker shade (MM) and attach images to your card using Stamping Dimensionals and Sticky Strip to create the two layers. Attach a Pearl in the middle of your butterfly.
 That's all there is to it! Happy crafting.
Inspired to make one? Please be nice and link back to this post to acknowledge the source of your inspiration.
I'll be back later with some cards that I made to highlight several different Dynamic Duo Combinations from the Stampin' Up! Color Coach. 'Stay tuned' ...
I'll be back later with some cards that I made to highlight several different Dynamic Duo Combinations from the Stampin' Up! Color Coach. 'Stay tuned' ...


Comments
keep on stamping
Tracey.
I love this!! WOW the pink and the blue and the hostess set!! WOW!!! Love that you've shared it with us all thanks heaps!
SMiles and HUgs Sharnee :)
I love the cards they are stunning.
Great idea!
Marie-Josee from Quebec
xxxxx Juliette