Just Add a Technique - Challenge # 17 at Just Add Ink

Paper Beads and Faux Silk
 Asian Artistry
This week at Just Add Ink we have a challenge with a difference. It takes on the form of a Blog Hop. You will need to visit all the Design Team Member's Blogs and check out all the wonderful tutorials the girls have put together to highlight a certain technique.
Decide on which technique you'd like to try and make a card, scrapbook layout or 3D item etc. and enter it in this week's challenge on the Just Add Ink Blog.
I have put together a very simple tutorial to show you how to make Paper Beads and Faux Silk.
Paper Beads
Decide on which technique you'd like to try and make a card, scrapbook layout or 3D item etc. and enter it in this week's challenge on the Just Add Ink Blog.
I have put together a very simple tutorial to show you how to make Paper Beads and Faux Silk.
Paper Beads
 Step 1 - Using your paper cutter, cut out some long triangular strips of paper the length of your chosen DSP. Mine have been cut about 1.5 centimetres at the widest point. I only needed 3 beads but I cut an extra one in case I 'muffed' up.
 Step 2 - Starting at the wide end, roll up the strip of paper applying glue as you roll. At the beginning make sure you leave a big enough hole to thread your Hemp Twine through. Secure firmly at the end with an extra dab of glue. I prefer to use the 2-way glue because of the finer point on the end.
If you have a quilling tool it would make this step nice and easy!
For a really lacquered look, apply Crystal Effects (not used in this example).
 The finished beads all ready to thread.
 A close up photo showing the beads attached to the finished card.
Yep ... it's that simple! Thanks, Andrea, for teaching me how to do these last September school holidays. I've finally got around to making some more to put on a card!!
Faux Silk
 Step 1 - Stamp your image onto tissue paper and add extra colour if desired. For the bird I used Riding Hood Red ink with a blender pen.
 Step 2 - Make sure the ink is dry and scrunch up your stamped tissue paper paper a few times.
 Step 3 - Unfold and straighten it out a little.
 Back View
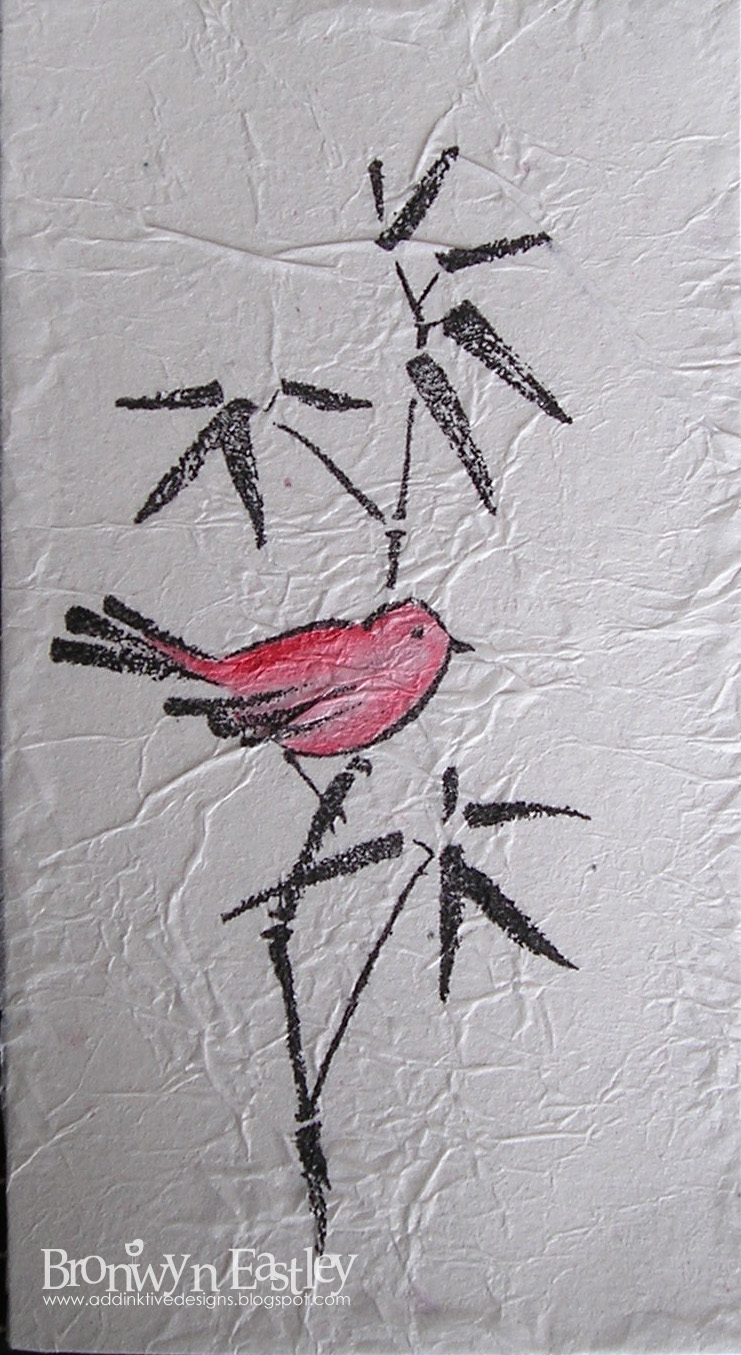 Don't straighten out the tissue paper too much when attaching it to the cardstock as this will take away the lovely Faux Silk look that you are trying to achieve.
 A close up of the finished faux silk section which has been double backed using Basic Black and Confetti White cardstock.
Thanks for taking the time to check out these mini tutorials. Your next stop along the way is with the lovely and talented, Chantell. You can hop to her blog by clicking on the picture below.

Have fun!
Bron XX
PS: How cool is this! Sarah, Kirsty and I all made it to the Late Night Stampers' Blog Finds of the Day for our tutorials!
Bron XX
PS: How cool is this! Sarah, Kirsty and I all made it to the Late Night Stampers' Blog Finds of the Day for our tutorials!


Comments
Rach:)
Lee x
S x
Faux silk -- I have been wanting to do that for ages and your tutorial made it easy to understand.
I'm thinking future swap idea!!
Thanks so much.