Very cute Bron! I am back from fishing...without a fish I might add...but a great break away. I hope I get to play in my craft room over the next couple of days and can make something as exciting as you do!
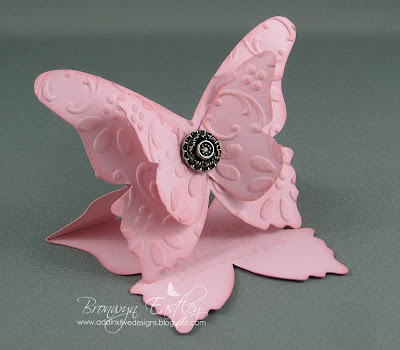
This card uses SU's Blushing Bride card stock and ink, the Beautiful Butterflies Bigz Die and Antique Brads . The sentiment is from the stamp set, Butterfly Prints and I have used the textured impressions embossing folder, Finial Press in this example. If you wish to see my tutorial, it is only available as a pdf file, with the purchase of the Larger Butterfly Easel Card Tutorial. Unfortunately, a few websites have copied my entire tutorial and published it without my consent, including all the photos and instructions. It's just as well I add a watermark to everything. So, after two years of sharing the love, I feel I need to remove the instructions from this post to avoid any further plagiarism. Thanks for your understanding. ........................................................................................................................................................... Disclaimer: My tutorial does not replicate the one that...
Photo Wallet and Butterfly Easel Card The Colour Combo for Just Add Ink's 57th Challenge Butterfly Easel Card I designed a butterfly easel card for my latest project at UStamp with Dawn and Friends using the Punch Bunch Stamp Set . For this challenge I popped the little butterfly from the Bliss Set , added some pearls and stamped the gorgeous flourish from the same SAB stamp set to form the background pattern for both die cut butterflies. I also sponged around the edges with River Rock Ink. PS: Thanks again to Nancy Riley for choosing this card as one of her iPicks for this week! Inside the Photo Wallet This would make a Lovely Hostess Gift (especially for a scrap-booking enthusiast) Complete with Photo Mats Instructions for the Photo Wallet can be found HERE . My Tutorial for the Butterfly Easel Card can be found HERE . Project Recipe for Photo Wallet and Butterfly Easel Card Stamps: Bliss (SAB), Fresh Cuts Ink: Cherry Cobbler, Daffodil Delight, River Rock Card Stock...
Hi and welcome to the ESAD-SU, Sale A Bration Blog Hop . ESAD is an Aussie based group just for E xtremely S pecial A ussie and New Zealand Stampin' Up! D emonstrators. I joined this group just before Christmas and am excited to be part of my very first Blog Hop! I have made some examples from the Happy Moments Sale A Bration Stamp Set. It was a tough decision about which one I'd purchase for the pre-order as I LOVE all four of them! It was the little bird stamp that won me over but I'm looking forward to earning the remaining three during the SAB period. Sample 1 - Gift Box This little gift box was made from a template, taken from the SU Demonstrator Web Site Pattern Library (Box No. 21). It is featured in the SAB Catalogue (page 2), with the Vintage Labels Set. I loved the whole layout, so this is a CASE of the original. Project Recipe: Stamp Sets: Happy Moments (SAB), Boho Backgrounds Cardstock: Textured Sahara Sand, Baja Breeze Ink: Baja Breeze, Kiwi Kiss, Ba...


Comments